Sunday was rainy in the morning and then supposed to be dry. I mostly worked on other indoor house projects for the morning, but when I took a break and saw the sun, I decided to try and work on the second wave of metal trim. I got all my measurements done (some pieces couldn’t be measured until the first wave of corners and other abutting edges were installed). Then it started drizzling right as I was about to cut, so I had to abort. Yay, Spring.
After that last vengeful shower, it dried up for Monday (aka Memorial Day) as predicted so I got to it. I cut all the remaining metal pieces in an hour or so and then was ready to start painting those pieces…

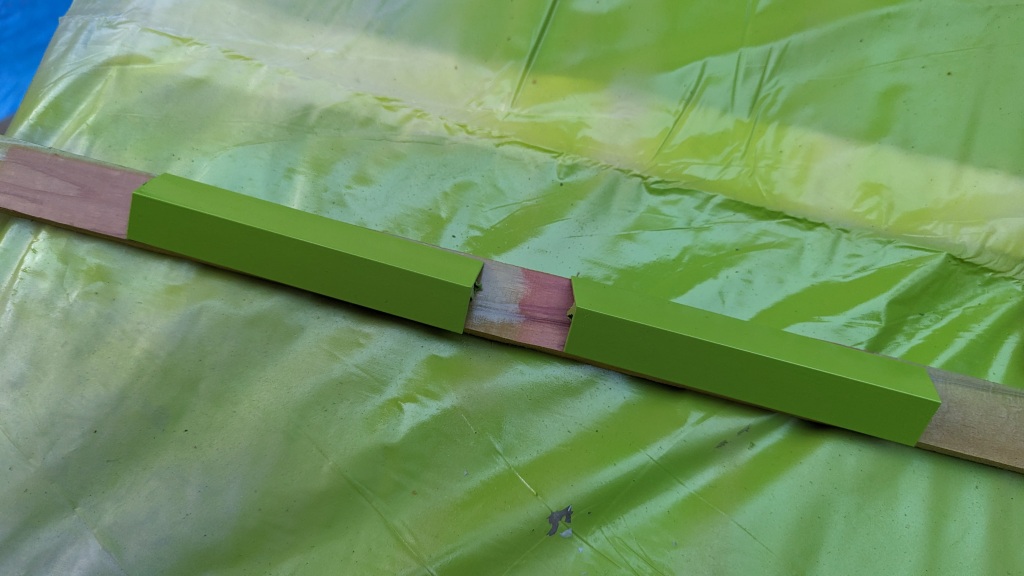
Here we are with the ends primed, the off-white undercoat on, and the first dust of green. When I started this I didn’t have the extra two pieces of plastic on the left and right and let’s just say that our hot tub cover now has a little permanent snow (whitish dusting). Oops. Maybe one day I’ll grab some brown and dust it back to a consistent color.
For the most part this was pretty uneventful and after several more passes spread apart, I got them all done with the green.

The thinner parts are the top caps for J trim and the wider bits are for H trim. They’re called this because when you look at the profile, it’s a letter J or H shape. J covers one edge (top… can’t use trim on the bottom edges of panels or it collects water). The H trim covers two edges. In this design, H is always vertical between panels and along window edges. J runs along the tops of panels.
Weird lighting in this pic is from an unusual phenomenon where there aren’t enough clouds in the sky to block out the sun, so the light part comes over the house. The rest is in glorious shadow.
There was one hiccup, of course. It’s never easy.
I forgot that the J channel on the top edge of the sides is at the roof rake angle, so the ends have to be cut (2.5/12 pitch, 11.76° angle, which I have memorized by now). Those edges are longer than 8′ so are made of a nearly 8′ piece and a short 18″ piece (the two shortest J channel pieces in the pic, about middle front). So with the angles cut after the fact it takes a little length off one side, and therefore I’ll have to recut those 18+” pieces. I’ll do that once I have the long pieces up, which lets me measure exact length anyway, and is better than the measure and prayer method I was going to use. Got too clever!
Funny enough, if I hadn’t had to special order 8′ because of FedEx, these would have been cut in one shot from 10′ runs and the entire pieces would have been like 1/4″ too short and I’d have to piece it anyway. Irony.
The cottonwood fluffs have died down to about 25% as bad as they were a week ago. Few enough that only a couple small strands landed on the metal in the 30 or so where it’s wet. That’s okay though, I’ve found that if you come back when it’s dry to the touch you can just lightly rub them with your finger and they roll up and come off clean. There was a notable breeze at times that was playing with my aim, so I had to wait for that to die down when it would come up. The good thing about a breeze is that it carries away the fumes quickly so I really wasn’t in a cloud of solvent and paint.
These are all now inside the studio to cure for a day or so before I do the matte sealer coat, which I think I will still do, even though these are destined to all get sprayed with a final coat of the latex Sherwin color at some point. The matte will help them look better in the meantime. I also need the paint to cure hard enough that it doesn’t get messed up when I pound on the painted face of it to fully seat it in the base.
What’s going to be frustrating but fun will be to see that the newly finished pieces of the J along the front (top and under the windows) will be darker than the two pieces that are up already because those didn’t get as many coats (and blend better). That seam is going to be super noticeable until I get that final trim coat done.
In other news, I have decided on a floor finish and ordered it. Hopefully by the time the weather turns warm enough that I can take the door off, the material will be here. Further hopefully I will have emptied the studio and sanded everything so we’re all prepped to go as soon as it’s sunny and 70+ out so I can take the door off, crack the window, and ventilate the space while each coat of sealer and poly are applied (1+3 anticipated coats, 2-3 hours apart, but I’ll probably wait on the 3rd finish coat til I’ve done everything else a few weeks out.


Leave a comment